Sorry people,
I have been slack and done no updates either here or on my YouTube channel for some time.
No empty promises, I just have to get in an upload content and videos.
Just a few events that have come and gone.
ICM have release a WWI Diggers figures kit in 1:35 scale.
I've brought 2 of these, built one set up in a small diorama and the other is on the shelf.
I have a kit review to post on youtube.
QMHE (Queensland Model and Hobby Expor) has come and gone. This is a major Model event for Queensland.
This year, it was relocated to new larger facilities. I also joined the committee as an assistant. My recommendation to anyone, join one of these events - they are busy but enjoyable.
We had record crowds this year, due in part to new facilities and marketing. We had support from the local Council.
Model Comp entries were down on previous years, however we still had over 400 entries ...
Bandai - this is old news to many, have released Star Wars model kits.
There are some kits of the new Ep7 X-Wings and Tie fighters, however I am not aware of International online model shops selling them - it appears only available in Domestic Japan.
Revell is also tooling up with a similar range of kits. Revell also appears to have the FineMolds molds for the 1/48 X-Wing and the 1/72 Falcon - both have been released.
This is just a quick update - more to follow
Thursday, 10 September 2015

Friday, 4 October 2013
QMHE 2013
Recently Queensland Hobby and Model Expo was held (8 - 9 Sept).
The photo's are of the Competition Table - and some photo's of the Gundam Australia Forum guys and girls who showed up on the weekend.
Blog Update
Well, My local Hobby Expo has come and gone (QMHE - Queensland Hobby and Model Expo). This was held Sept 8th and 9th. I usually have a break from modelling after this event. So now the break is over, time to get Modelling back on track.
I have over 23 model kits in my backlog. Time to clear these off the bench, some have definitely become shelf queens.
As you may have noticed, a few projects I had posted earlier haven't been updated, so I'll do some blog updating as well. Pics of QMHE will be coming up shortly
I have over 23 model kits in my backlog. Time to clear these off the bench, some have definitely become shelf queens.
| Maker |
|
Model | |
| MPC/ERTL | X-Wing | ||
| MPC/ERTL | AT-AT | ||
| Airfix | HMS Victory | ||
| Bandai | 1/100 | W-Gundam Zero Custom | |
| Bandai | 1/100 | GN-001 Gundam Exia | |
| Hasegawa | 1/72 | YF-19 | |
| Revell | 1/72 | AT-AT | |
| IMAI | Macross Figure | ||
| row 2, cell 1 | 1/200 | Bismark | |
| Wave | 1/72 | Legioss AFC-01h ETA | |
| Bandai | 1/72 | Destroid Spartan | |
| Bandai | 1/72 | Destroid Defender | |
| IMAI | 1/144 | Destroid Defender | |
| AMT/ERTL | 1/72 | B-52 | |
| Knights Models | 25mm | Han Solo | |
| HobbyKit | 1/72 | Blackhawk | |
| Italeri | 1/35 | M113 | |
| Matchbox | 1/72 | Jet Provast | |
| Revell/Monogram | USS Voyager | ||
| AMT/ERTL | TOS USS Enterprise | ||
| AMT/ERTL | USS Enterprise | ||
| Tamiya | 1/35 | Dinosaur |
As you may have noticed, a few projects I had posted earlier haven't been updated, so I'll do some blog updating as well. Pics of QMHE will be coming up shortly
Sunday, 30 June 2013
Blog Update
Added new images to the gallery page. The Andrea TechnoCop (RoboCop) has been added to the Complete 2013 Models gallery
RAN Sea King 50th Anniversary
Back on task with the RAN Sea King 50th Anniversary build.
Sorry, no video update on the progress. The paint scheme has caused me some headaches and found a few flaws that need to be fixed.
I ended up using Gunze Paint H57 Aircraft Grey, H1 Gloss White and H25 Sky Blue.
I'm using the Hawkeye Models decals for the 50th Anniversary markings. The come with a template for the white and grey demarcation. Unfortunately, due to the detail I've added, they don't fit well, so I've tried using tamiya tape for masking. Used the templates as a guide to cut new templates and cut through to hard and ruined the underlying paint work, so had to fill and re-sand.
After some heart ache, I've got the grey and white demarcation done.
Now the blue demarcation is a soft edge and one photo's I've seen, the radome has overspray - yes over spray of the blue colour. So free hand airbrushing was easy to apply this time.
The Hawkeye decals are not individually cut out, so you need to cut out each one before applying. I have to almost cut right through the backing paper in order to cut the decal film. I learnt as I was applying them on the model, that a sharp knife won't cut them while they are wet and even when dry tend to stretch rather than tear or be cut.
The decals are also printed and there is some pixeling of the artwork.
The colour decals are thin and the colours somewhat transparent. There is a seperate white sheet for the colour decals, to be applied onto the blue painted area.
 The colour decals apply right over these. They snuggle down well with Micro-Sol Micro Set. With the clear decal film cut close as possible to the markings, the decals look like they are painted on.
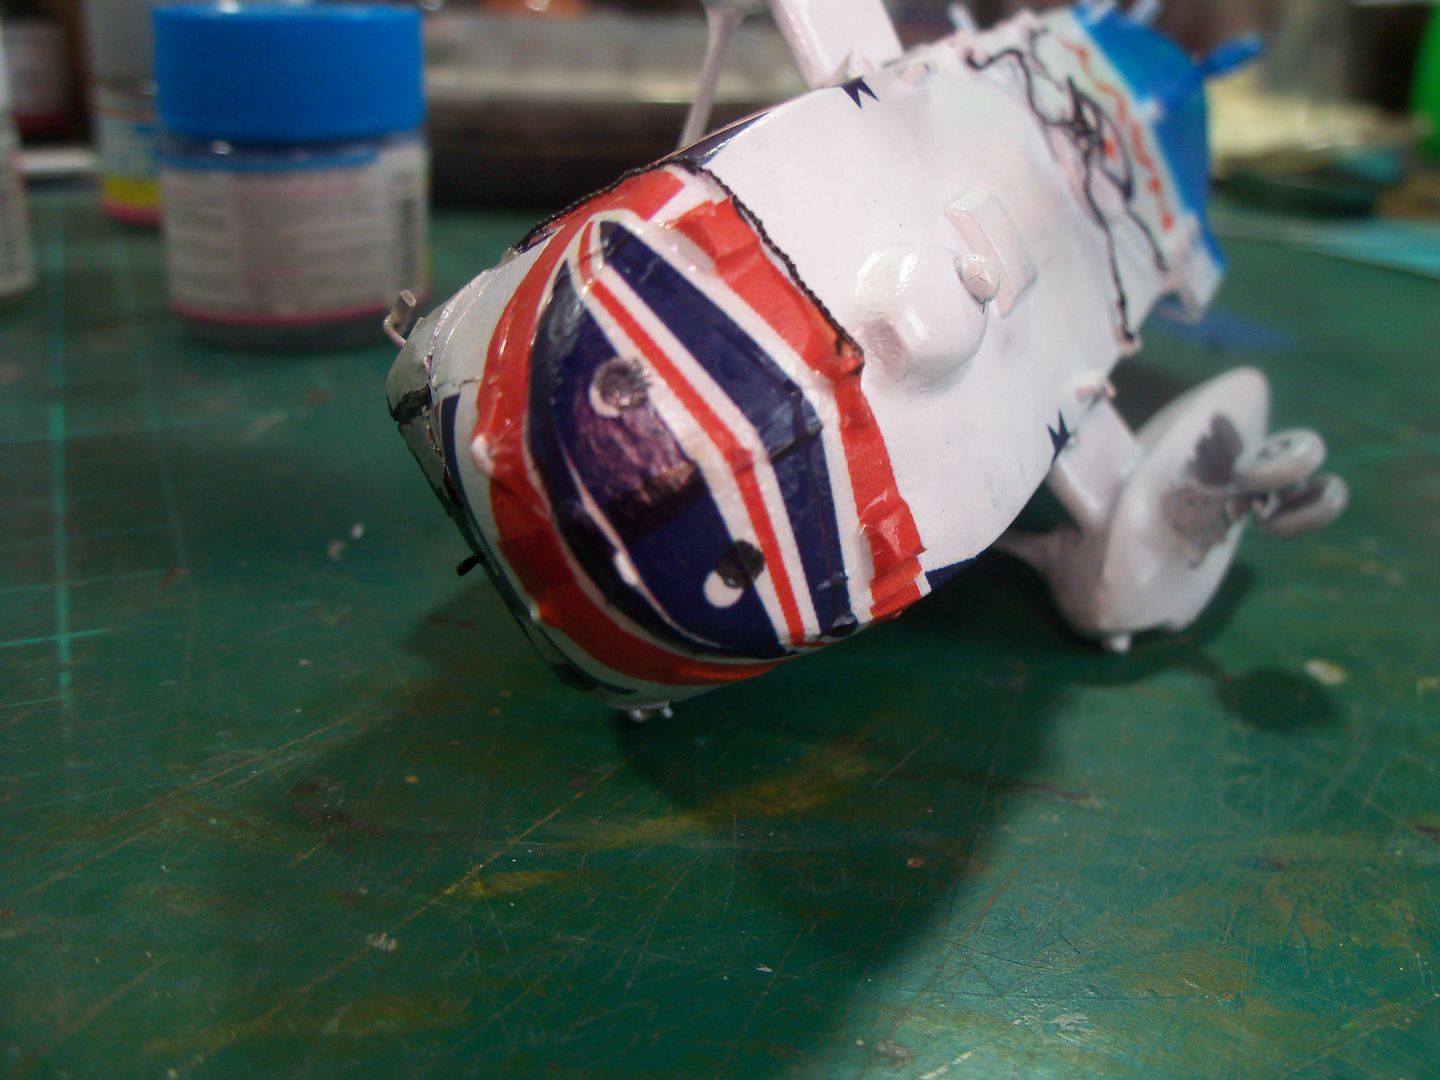
The decals go on easily, they can be stretched - I had to be careful around some of the details, as I could easily warp the decal. This more so around the nose, where all that extra detail was starting to cause problems.


Now the big draw backs the decals aren't really designed to go around the nose, as you can see, I had some problems with the detail, but also, the decals ended up overlapping each other, which caused colour variation where it over lapped - I'll fix this up later.

I originally taped the nose cover while applying the side decals. I removed the tape before applying the main decal. There are alignment issues, gaps and the sizes are on the large side. I originally cut a slit down the middle of the main decal, but it wasn't long enough - it needs to go through about 3/4 of the decal. Since I didn't, the decal curled over and thankfully, the decal reacted well the Micro-Set and the decal snuggled down to a smooth finish, even over all that detail. Just more areas to touch up later.

Well, thats it for this update ...
Sorry, no video update on the progress. The paint scheme has caused me some headaches and found a few flaws that need to be fixed.
I ended up using Gunze Paint H57 Aircraft Grey, H1 Gloss White and H25 Sky Blue.
I'm using the Hawkeye Models decals for the 50th Anniversary markings. The come with a template for the white and grey demarcation. Unfortunately, due to the detail I've added, they don't fit well, so I've tried using tamiya tape for masking. Used the templates as a guide to cut new templates and cut through to hard and ruined the underlying paint work, so had to fill and re-sand.
After some heart ache, I've got the grey and white demarcation done.
Now the blue demarcation is a soft edge and one photo's I've seen, the radome has overspray - yes over spray of the blue colour. So free hand airbrushing was easy to apply this time.
The Hawkeye decals are not individually cut out, so you need to cut out each one before applying. I have to almost cut right through the backing paper in order to cut the decal film. I learnt as I was applying them on the model, that a sharp knife won't cut them while they are wet and even when dry tend to stretch rather than tear or be cut.
The decals are also printed and there is some pixeling of the artwork.
The colour decals are thin and the colours somewhat transparent. There is a seperate white sheet for the colour decals, to be applied onto the blue painted area.
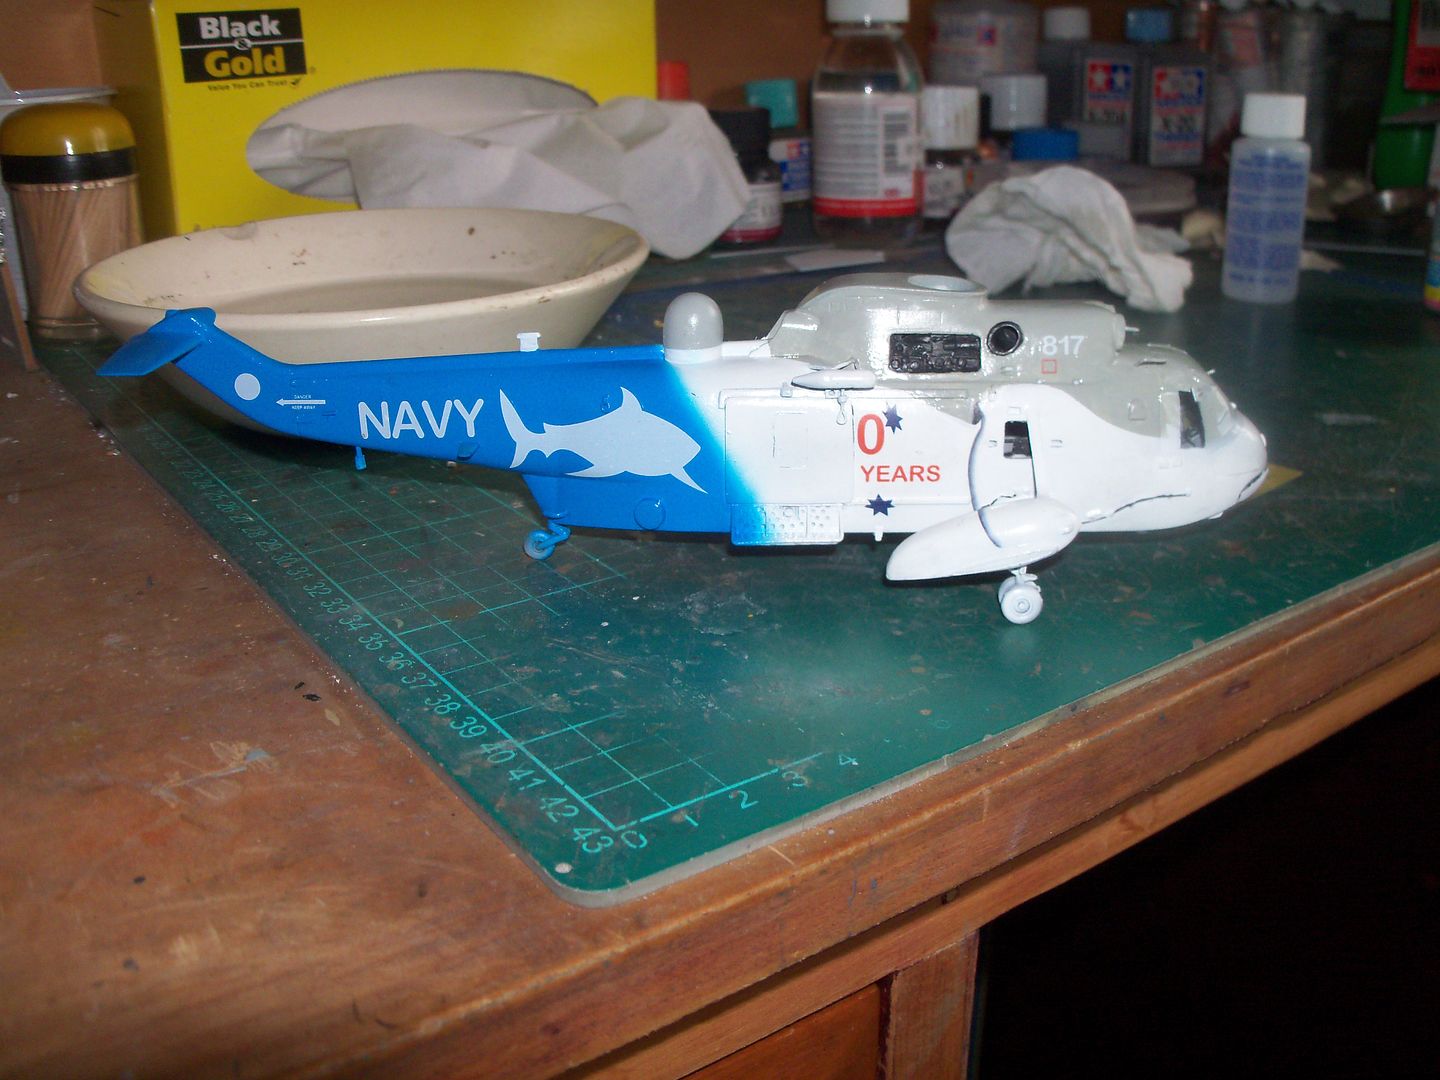
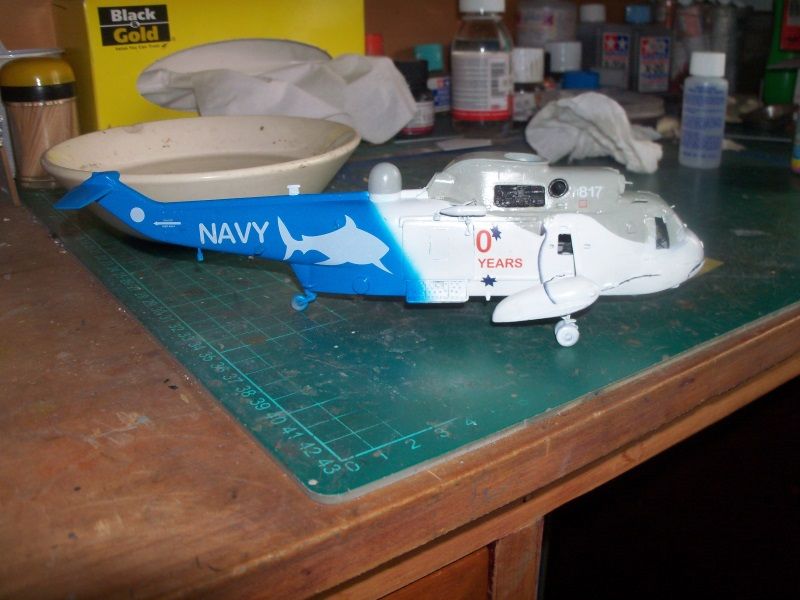
The decals go on easily, they can be stretched - I had to be careful around some of the details, as I could easily warp the decal. This more so around the nose, where all that extra detail was starting to cause problems.
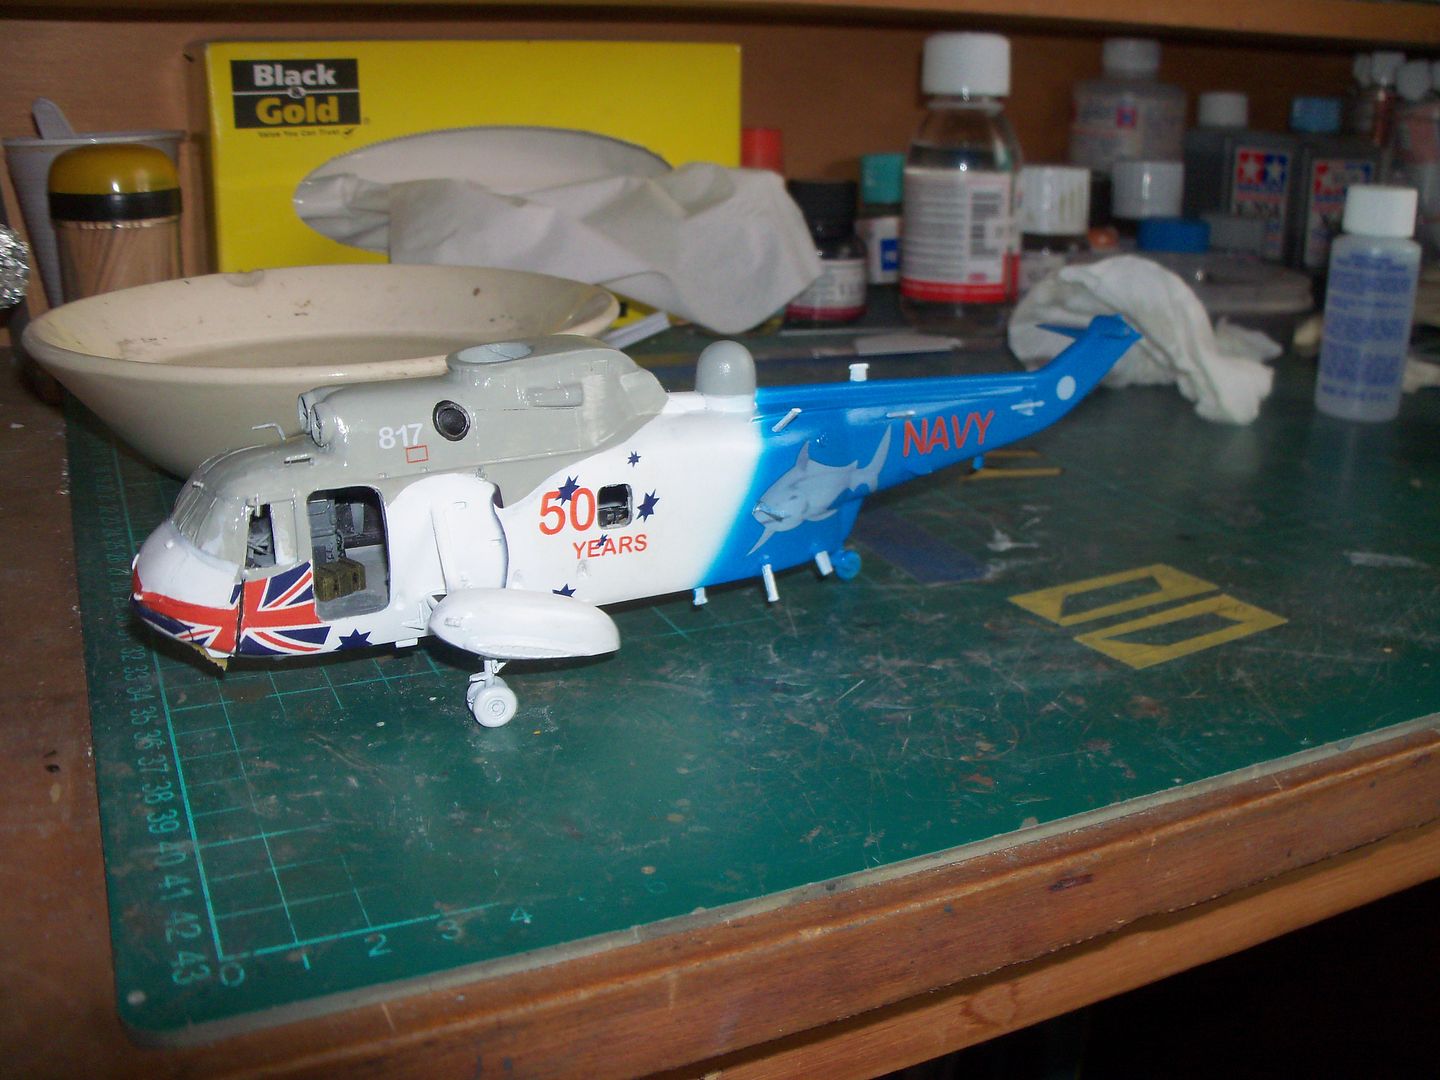
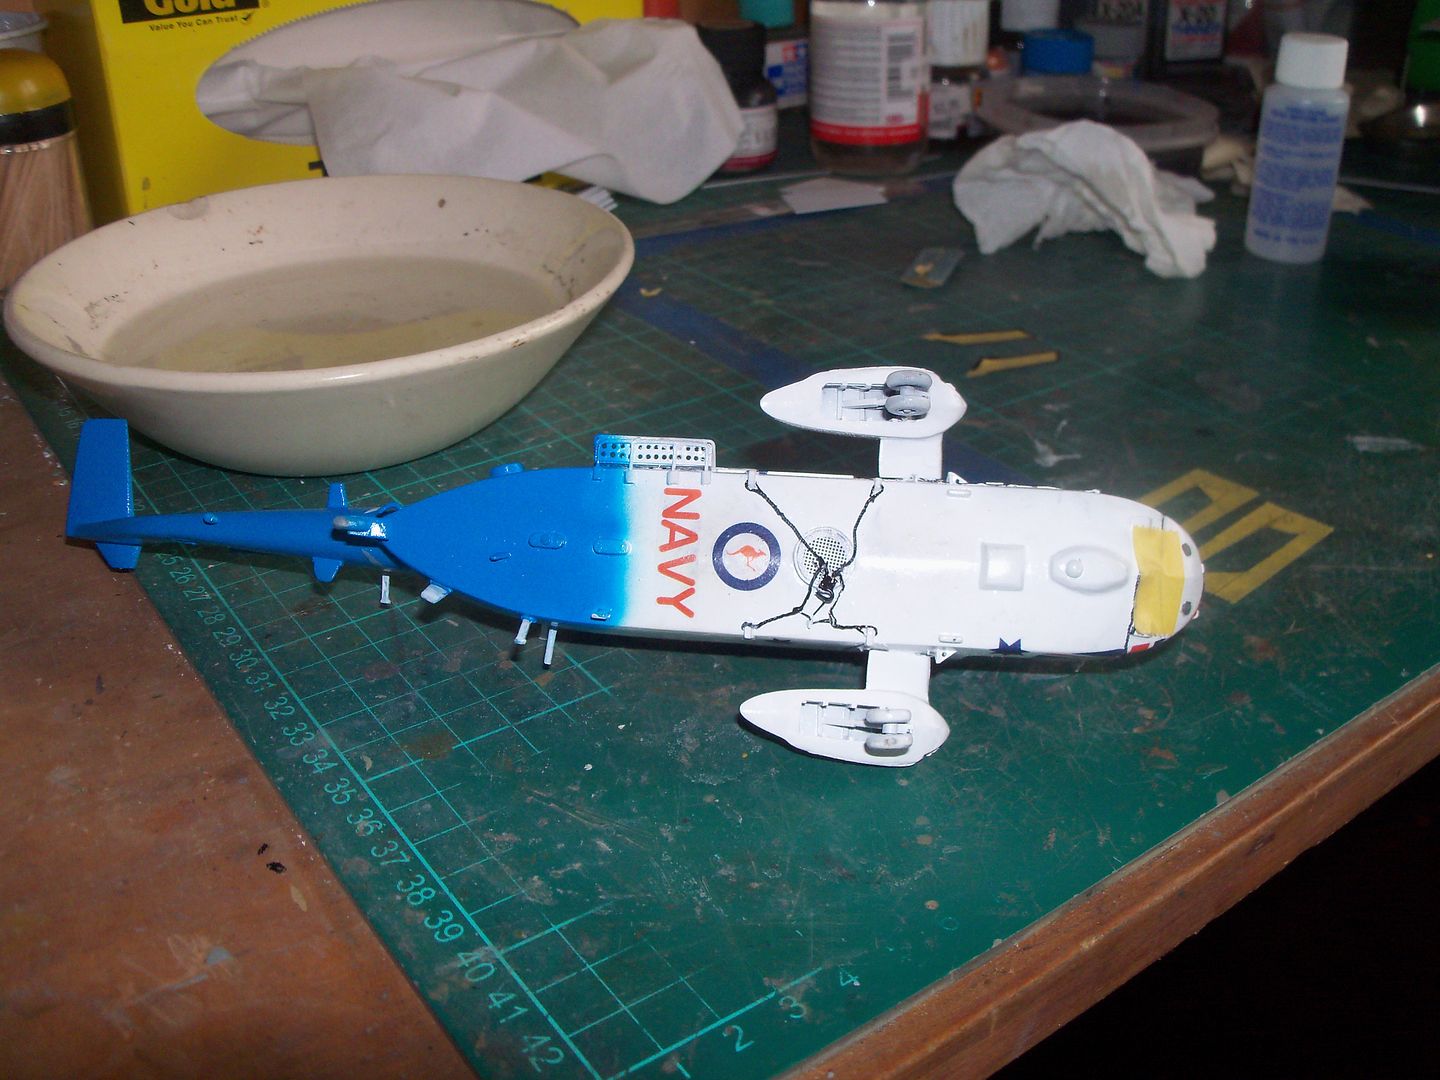
Now the big draw backs the decals aren't really designed to go around the nose, as you can see, I had some problems with the detail, but also, the decals ended up overlapping each other, which caused colour variation where it over lapped - I'll fix this up later.

I originally taped the nose cover while applying the side decals. I removed the tape before applying the main decal. There are alignment issues, gaps and the sizes are on the large side. I originally cut a slit down the middle of the main decal, but it wasn't long enough - it needs to go through about 3/4 of the decal. Since I didn't, the decal curled over and thankfully, the decal reacted well the Micro-Set and the decal snuggled down to a smooth finish, even over all that detail. Just more areas to touch up later.
Well, thats it for this update ...
Monday, 24 June 2013
Blog Update
G'day All,
As you can see I'm playing around with the blog layout and structure.
I'm use to using FrontPage or Dream Weaver to create websites, so using a blog is a bit of a challenge. So bare with me while I make some changes, hopefully I'll be able to achieve the blog function I want ...
Friday, 14 June 2013
Humbrol Weathering Powders
G'Day All,
Playing around with the new Humbrol Weathering Powders at the moment.
There are around 8 different powders available from Humbrol. At present, my local hobby shop only has 3, Black, Rust and Dark Earth - so its these 3 that I've reviewed.
I chose an Airfix WWI Female Tank for the weathering process.
Overall, the powders are ok, they do go on as indicated by the Humbrol YouTube, and can be worked with the Humbrol range of Enamel Thinners, MattCote and DecalFix.
The powders look like someone has ground up a chalk pastel stick of colours. You get varying sizes of dust particles in each bottle. They can be worked onto the model with paint brushes. Humbrol MattCote and Thinner can be used to apple the powder and hold them in place. DecalFix and water can be used as well, although the MattCote is the better alternative, as its a bit more resilient to handling. I find you can work with both mediums for awhile, however after a few hours the MattCote/Thinner mixture is difficult to work with. The other medium is still workable after a few hours.
The powders are messy to work with, so make sure you are prepared for a messy work area and hands.
I'll post some videos below of my earlier attempts at using them. Although I hadn't tested decalfix method at the time of the videos being created, I have tested them since. They do work well in this medium.
My tip to everyone, use very cheap or old paint brushes, as applying the powders can damage the bristles, especially if you want to create a caked on mud look.
I have mixed the powders with Tamiya weathering powders and get similar results.
In the videos, I'm also reviewing the Airfix Female Tank and creating a diorama.
Here are the videos;
Playing around with the new Humbrol Weathering Powders at the moment.
There are around 8 different powders available from Humbrol. At present, my local hobby shop only has 3, Black, Rust and Dark Earth - so its these 3 that I've reviewed.
I chose an Airfix WWI Female Tank for the weathering process.
Overall, the powders are ok, they do go on as indicated by the Humbrol YouTube, and can be worked with the Humbrol range of Enamel Thinners, MattCote and DecalFix.
The powders look like someone has ground up a chalk pastel stick of colours. You get varying sizes of dust particles in each bottle. They can be worked onto the model with paint brushes. Humbrol MattCote and Thinner can be used to apple the powder and hold them in place. DecalFix and water can be used as well, although the MattCote is the better alternative, as its a bit more resilient to handling. I find you can work with both mediums for awhile, however after a few hours the MattCote/Thinner mixture is difficult to work with. The other medium is still workable after a few hours.
The powders are messy to work with, so make sure you are prepared for a messy work area and hands.
I'll post some videos below of my earlier attempts at using them. Although I hadn't tested decalfix method at the time of the videos being created, I have tested them since. They do work well in this medium.
My tip to everyone, use very cheap or old paint brushes, as applying the powders can damage the bristles, especially if you want to create a caked on mud look.
I have mixed the powders with Tamiya weathering powders and get similar results.
In the videos, I'm also reviewing the Airfix Female Tank and creating a diorama.
Here are the videos;
Subscribe to:
Posts (Atom)